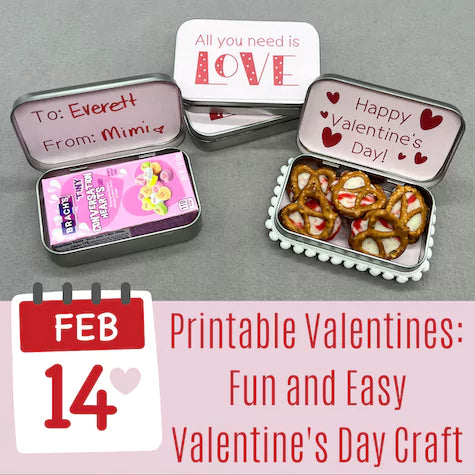
Quick + Easy Valentine's Day Printable Crafts for Kids That Are Simple + Fun
Valentine’s Day printables are a quick and easy way to jumpstart a DIY craft project for kids this Valentine’s Day. It’s no coincidence that we just added four new digital downloads for Valentine’s Day to our shop. In this post, I’m sharing one of the four designs.
I want to help you create something fun – but simple – with your students, kids or grandchildren, which is why I started creating digital downloads in the first place.
When my girls were in elementary school, we LOVED making Valentine treats for their classmates. As soon as February 1 arrived, we would start thinking up what to create. It always involved some type of print and cut project. Why? Because we could do it together, and it didn’t require a lot of time or effort; yet the results were always amazing and something the girls were proud to give their classmates at the Valentine’s Day party at school.
I wish I had taken pictures of all those Valentine’s Day craft projects. I don’t think I have a single picture of any of them. So…take it from me, snap a photo of your creations. Someday you’ll be glad you did.
WHY INAWE HANDMADE DIGITAL DOWNLOADS ARE THE BEST
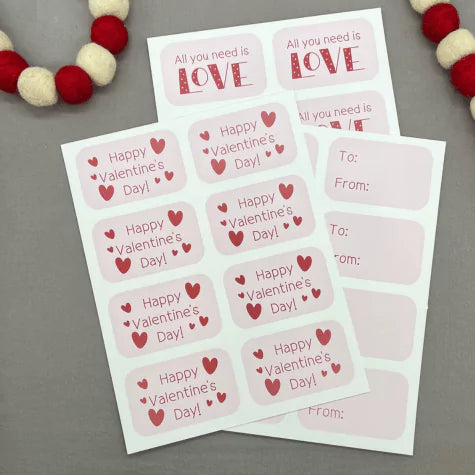
Because I’ve completed so many of these type of projects with my girls, I put a lot of thought into what to include with the digital downloads. Here’s what you get when you purchase inAWE’s Valentine printables:
3-page pdf – one page per graphic. Each page includes 8 per sheet. (If you need 24 Valentine’s then you print 3 sets and you are good to go.)
3 png files – one for each graphic: These are specifically for those who own an electronic cutting machine and know how to use the software. You can create your own print-and-cut files to save some time.
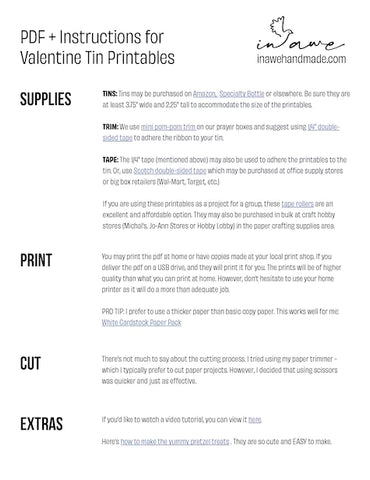
 Detailed instruction sheet: This pdf includes a TON of information to make this project quick and easy:
- Links to purchase all the supplies you will need
- 2 options for purchasing tins (one is Amazon, of course)
- Suggestions for the best adhesives to use (links provided)
- Optional add-ons to make your project special
- Type of paper we recommend for printing at home
- How to deliver files to a local print shop
- Link to YouTube video tutorial
- Link to recipe for easy-to-make pretzel treats
I’ve tried to provide more than adequate resources to help our printable customers to have an AWE-some experience. Here’s a YouTube video that shows me completing this quick, easy and fun Valentine’s Day project.
Also, I’ve recently created several pins on Pinterest related to these printables and other project ideas for Valentine’s Day. Check out these inAWE Pinterest Boards for more inspiration: Printables, Altoid Tin Ideas, Christian Printables and Valentine Gift Ideas.
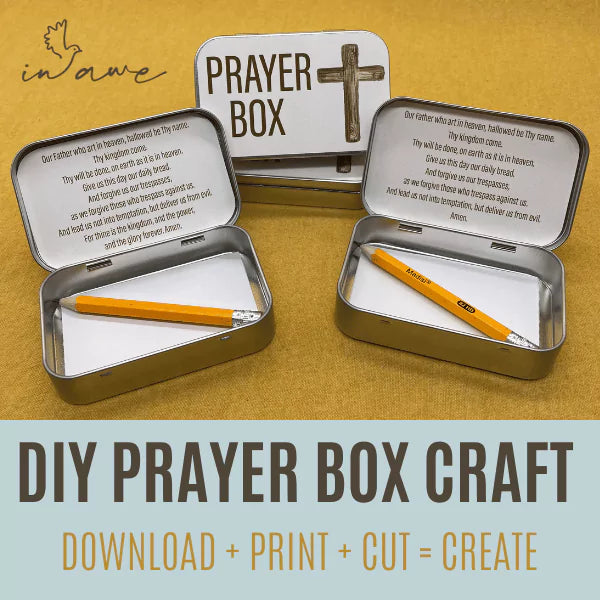
Now, let’s go through the steps of completing this project. The formula for using inAWE printables is Download + Print + Cut = CREATE!
PURCHASE DIGITAL DOWNLOAD
Here’s the printables section of inAWE Handmade’s shop. Once you’re there and you’ve decided what style you want to purchase, add it to your cart and checkout. There are a couple of ways to download your purchase. Right after checkout, you will see a blue button labeled Download Now that you can click.
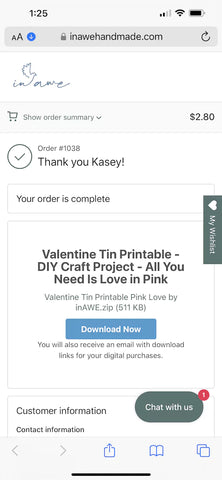
You will also receive an email with a download link.

DOWNLOAD PRINTABLE VALENTINES
If you are a newbie and have never purchased a digital download before, I’ve created this video that shows you how to download the files on your iPhone.
CAN I USE PRINTABLES IF I DON'T HAVE A PRINTER AT HOME?
You don’t have to own a computer and printer to complete inAWE printable projects. You can download them to your phone and then use several different methods to have them printed.
Here’s a few pointers if this is something you haven’t done before. Make sure you have the Files app on your iPhone. If you don’t have it, then you can download it from the App Store – just search “Files” and make sure Apple is the developer. This is where you will find your files once they’ve been downloaded. From there, you can use the share button to email them wherever you like.
PRINTING YOUR DIGITAL DOWNLOAD
Obviously, if you have a color printer at home, then you can print your digital download and move forward with your project. While you can print them on basic copy paper, I find them easier to cut and adhere when I use white cardstock which you may purchase from Hobby Lobby, Wal-Mart and Amazon.
If you don’t have a printer, you can still complete these projects. Using the Files app on your smartphone, you can email the 3-page pdf to:
- a local print shop and ask them to print it for you (ask them to use white cardstock)
- your organization (church, school, etc) and have them print it
- your good friend who has a printer and is willing to use some ink to help you out 😉
CUT YOUR PRINTABLE VALENTINES
There’s not much to say about the cutting process. I tried using my paper trimmer - which I typically prefer to cut paper projects. However, I decided that using scissors was quicker and just as effective.
I also mentioned earlier that you can use the png files to create a print-and-cut file if you own an electronic cutter and know how to use the software. I’m not going to get into the details of that here, because if you know, you know. And if you don’t – well, there’s always Google!
DETAILS ABOUT THE SUPPLIES – ALTOID TINS, ADHESIVE, ETC.
As I mentioned, when you purchase our digital downloads, they come with a detailed instruction sheet that includes links to help you quickly and easily purchase supplies. However, I also want to provide that information for you here, so you can see how simple this project can be.
WHERE TO PURCHASE EMPTY ALTOID TINS
When purchasing the empty altoid tins, the easiest and least expensive option is Amazon. Here are the tins on Amazon that are perfectly sized for our printable Valentine’s Day projects. I have a love/hate relationship with Amazon. I love them as a consumer, but I hate them as an online retailer. They have spoiled us all into thinking we should be able to get a product shipped and on our porch in less than 2 days 🙄
Please allow me to get up on my soap box for a moment. Amazon has 110 fulfillment centers in the US. Most small businesses (like inAWE Handmade) have ONE. We don’t have the option of shipping your product to you from the closest warehouse. Every order is handcrafted and ships from our home in Stillwater, Oklahoma via the US Postal Service. We don’t have the ability to enter into high-volume contracts with UPS or FedEx, so we use the most affordable option – which is USPS. Ok- rant over.
If you need a LARGE quantity of tins (greater than 300), then you can’t beat the bulk pricing offered by Specialty Bottle.
BEST ADHESIVES FOR DIY CRAFT PROJECTS
We recommend three different adhesive options depending on how you plan to use our printable Valentines. First, if you are completing them at home with your kids or grandchildren, then nothing is easier to use than Scotch double-sided tape which may be purchase at office supply stores or big box retailers (Wal-Mart, Target, etc.)
If you want to dress up your tins with some trim, then the best way to adhere the trim to the tin is by using this double-sided tape from Amazon. It is what we use for inAWE Handmade prayer boxes. It may also be used to adhere the prints to the tins. You can also adhere the trim to the tin using a glue gun but it can get messy, and sometimes, dangerous (Yes! I'm speaking from experience).
If you are completing this project with a large group (school classroom, Sunday school class, Girl Scout troop, etc), then these tape rollers are an excellent and affordable option. They may also be purchased in bulk at craft hobby stores (Michael’s, Jo-Ann Stores or Hobby Lobby) in the paper crafting supplies area.
WE LIKE EXTRAS – POM POM TRIM AND PRETZELS
As I mentioned before, you have the option to dress up your tin with trim. At inAWE Handmade, we like using mini pom-pom trim, but any type of trim will add some texture and dimension to your project without adding much cost. It takes about one foot (12” of trim) to wrap around the tins. You can use that number to determine how much trim to purchase and if you are willing to add that additional cost to your project. It is certainly not necessary as they are adorable with or without trim.
Finally, here’s a link to the pretzel treat recipe – which is about the easiest recipe you will find. Two ingredients – pretzels and Hershey’s Candy Cane Kisses. If you are not a fan of mint (or can’t find them in your local store) any type of Hershey’s Kisses will do.
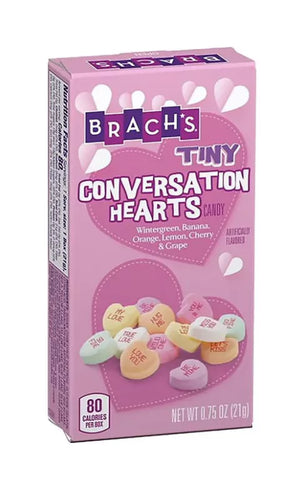
Another option is to fill them with any type of candy; it doesn’t have to be homemade. These Brach’s Tiny Conversation Hearts candy boxes fit perfectly inside these tins.
I found them at my local Hobby Lobby store, but a quick Google search found them at Five Below (best price), Target, and, of course, Amazon.
CREATING YOUR DIY VALENTINE CRAFT USING ALTOID TINS
And now, the fun part! CREATING! By now, I assume you have rounded up everything you need: prints that are cut and ready to adhere, tins, adhesive, trim (if using) and a treat to put inside your completed project.
If you’ve decided to dress up your tin with some trim, I’d recommend doing that first. Place the double-sided tape around the tin – just under the lid. It’s perfect because it helps keep it straight. Then, peel off the top layer (it’s super slick) and add the trim – using the rim of the top lid to help you put it in place. Push down to ensure it is adhered securely.
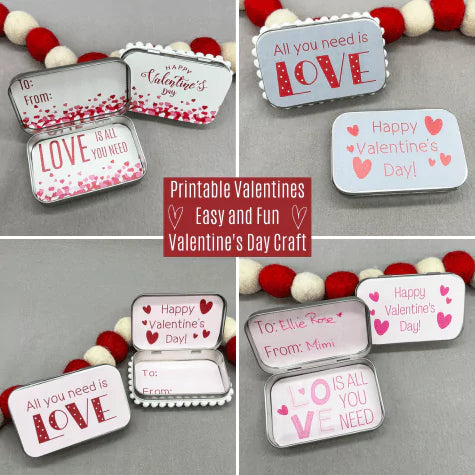
Now, one of the fun parts of this project is deciding how you want to design your tin. You can put the prints wherever YOU decide. Maybe you want the front of the tin to have the Happy Valentine’s Day graphic. Or possibly you prefer the graphic referring to L-O-V-E. Or you’d rather have the To:/ From: print on the outside of your tin. It is entirely up to you. In fact, you don’t even have to use all three design options. You can choose to use one or all three!
Whatever design you decide to use for the front of your tin, I suggest putting some adhesive on each corner, as it will receive the largest amount of touching ;) For the inside designs, it’s not necessary to use as much because they are sitting down inside the tin so their edges are protected. For the tutorial video, I just put a large piece of adhesive in the middle to hold it into place.
Also, if you are using the To: / From: graphic, be sure and fill it out before adhering it to the tin; it’s easier to write on a flat surface – rather than inside the tin.
And, just like that, you’re ready to put some treats inside your tins and share them with your Valentines!
I truly hope you this tutorial is easy-to-follow and helpful. If you have any questions, suggestions, comments, etc., feel free to reach out to me via our contact form. I’d love to hear from you.


Leave a comment